Human in the Loop
This tutorial provides step-by-step guidance on constructing a workflow that incorporates a human-in-the-loop approach. Utilizing the Agentok Studio template, Human in the Loop , you can engage with it directly or fork it to tweak the flow to your specifications.
The tutorial leverages the official notebooks Simple Chat and Human Feedback as its foundation.
Prerequisites
You’ll need access to Agentok Studio, which is accessible either online for immediate use or locally on your machine for a more personalized setup. This guide will focus on utilizing the online version of Agentok Studio.
Steps to Create a New Workflow
Initialize a New Workflow
Begin by signing into Agentok Studio. Once logged in, opt for the ‘Build from Scratch’ option to establish a new Workflow.
Orchestrating Your Workflow
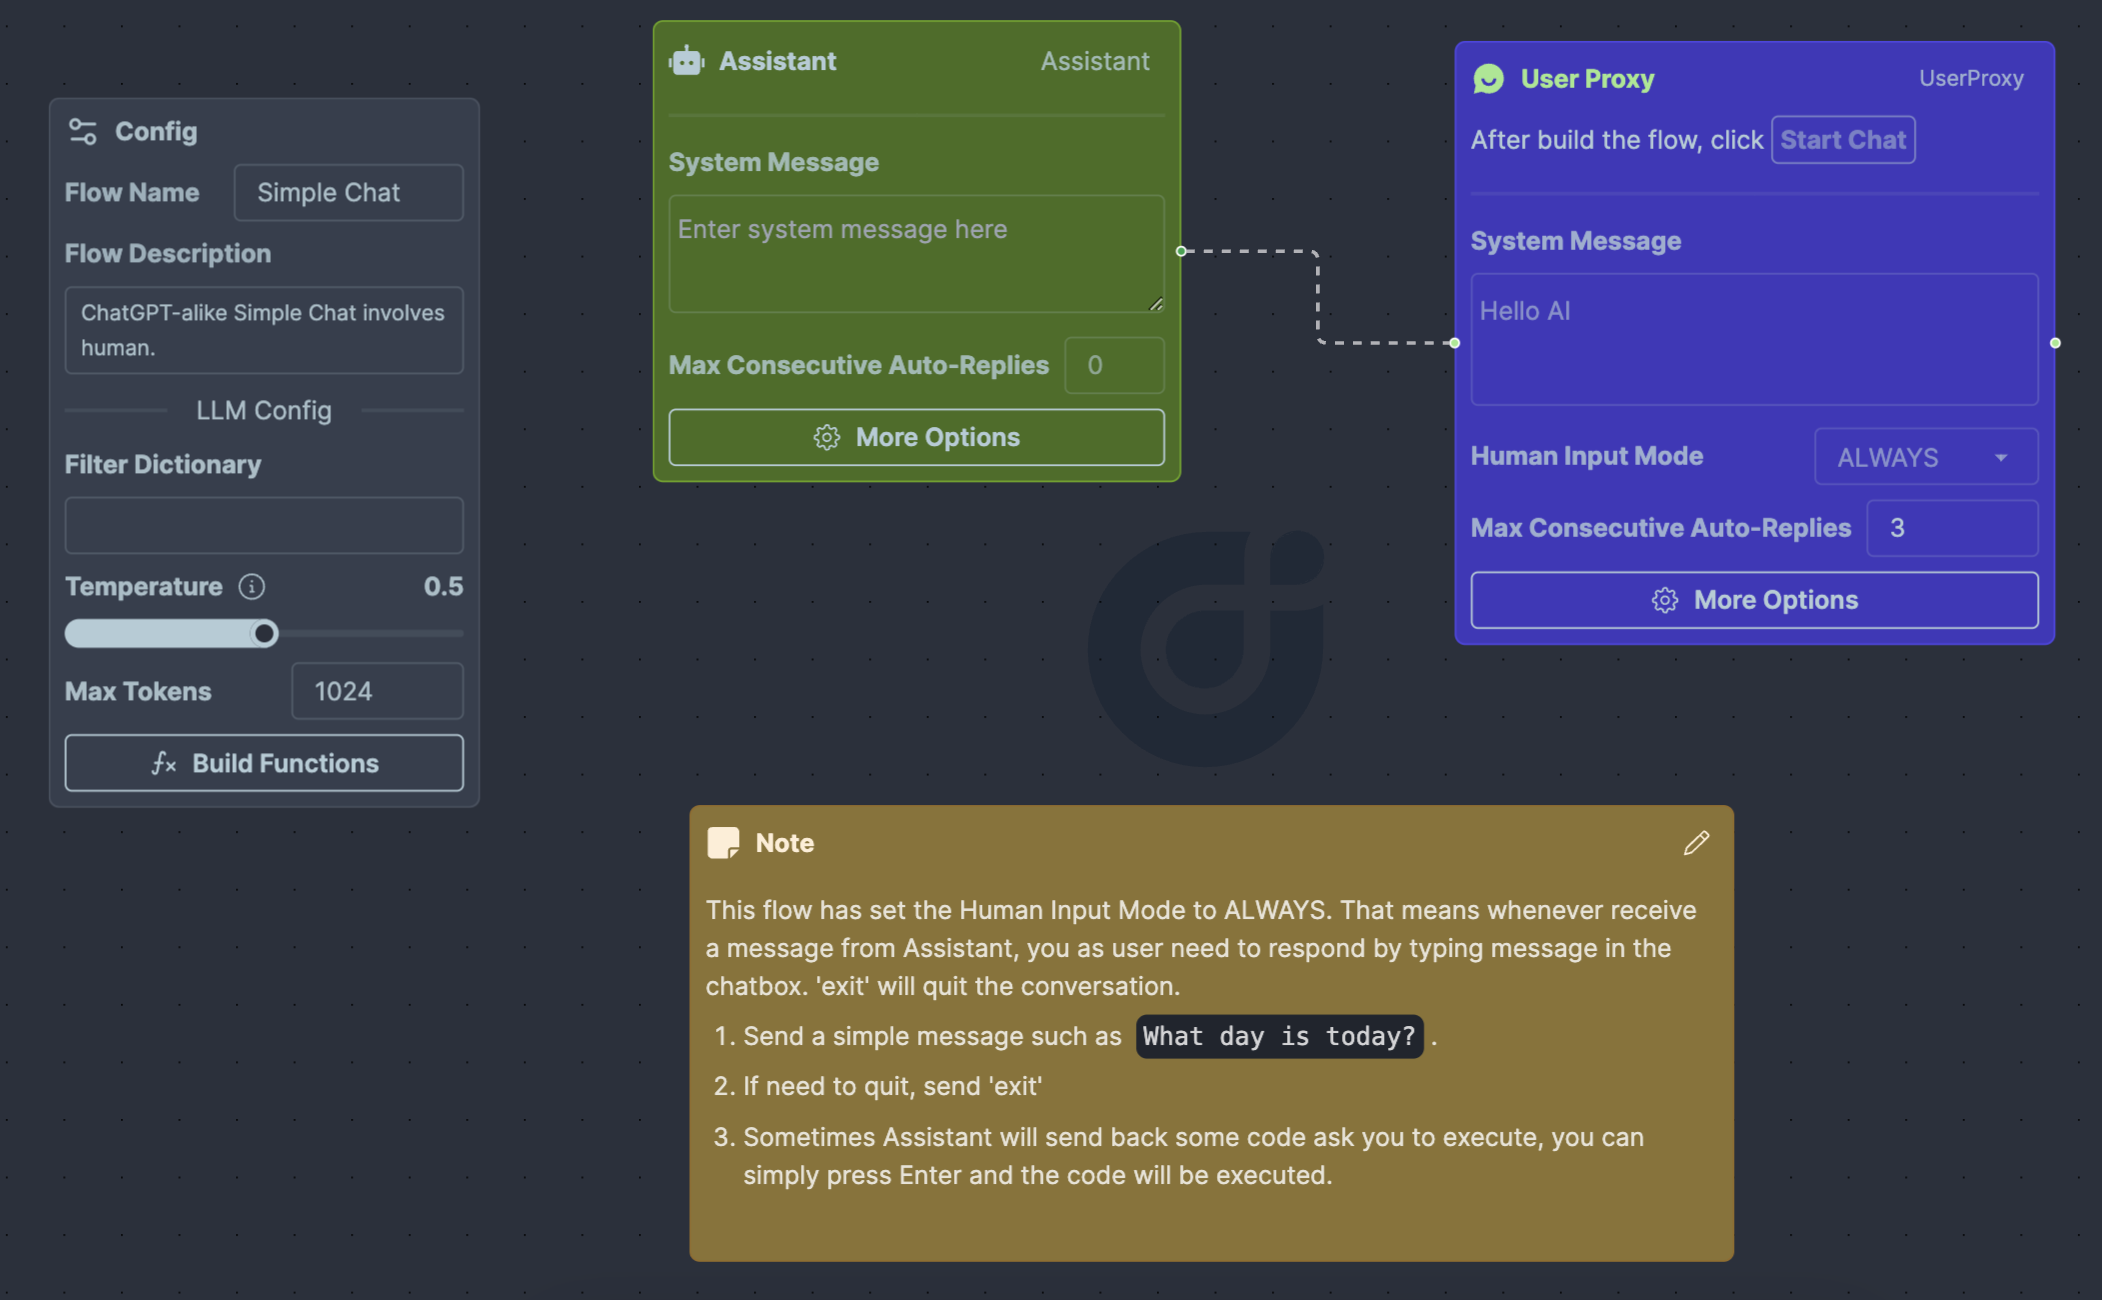
First, clear the canvas by removing any pre-loaded sample nodes. Next, populate your workflow by adding the following nodes:
- Assistant Agent: This will serve as the workflow’s Assistant.
- UserProxy Agent: Label this as
UserProxy.
Refer to the accompanying illustration to visualize the flow arrangement:
Configuring Your Agents
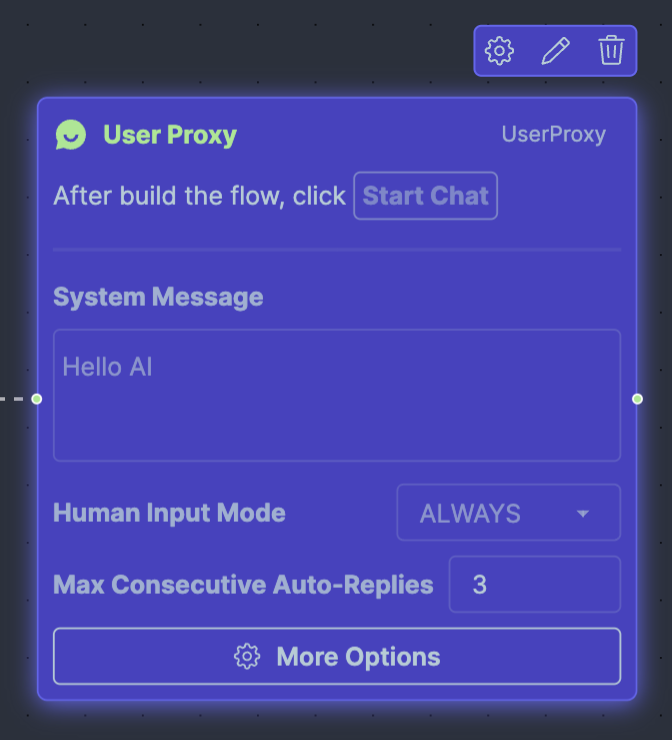
The primary focus here is on configuring the UserProxy Agent:
-
Alter the
Human Input Modesetting toALWAYS. -
Adjust the
Max Consecutive Auto Repliesto a value greater than0, such as3. This allows the UserProxy Agent to independently execute received code and dispatch the results back to the Assistant Agent. -
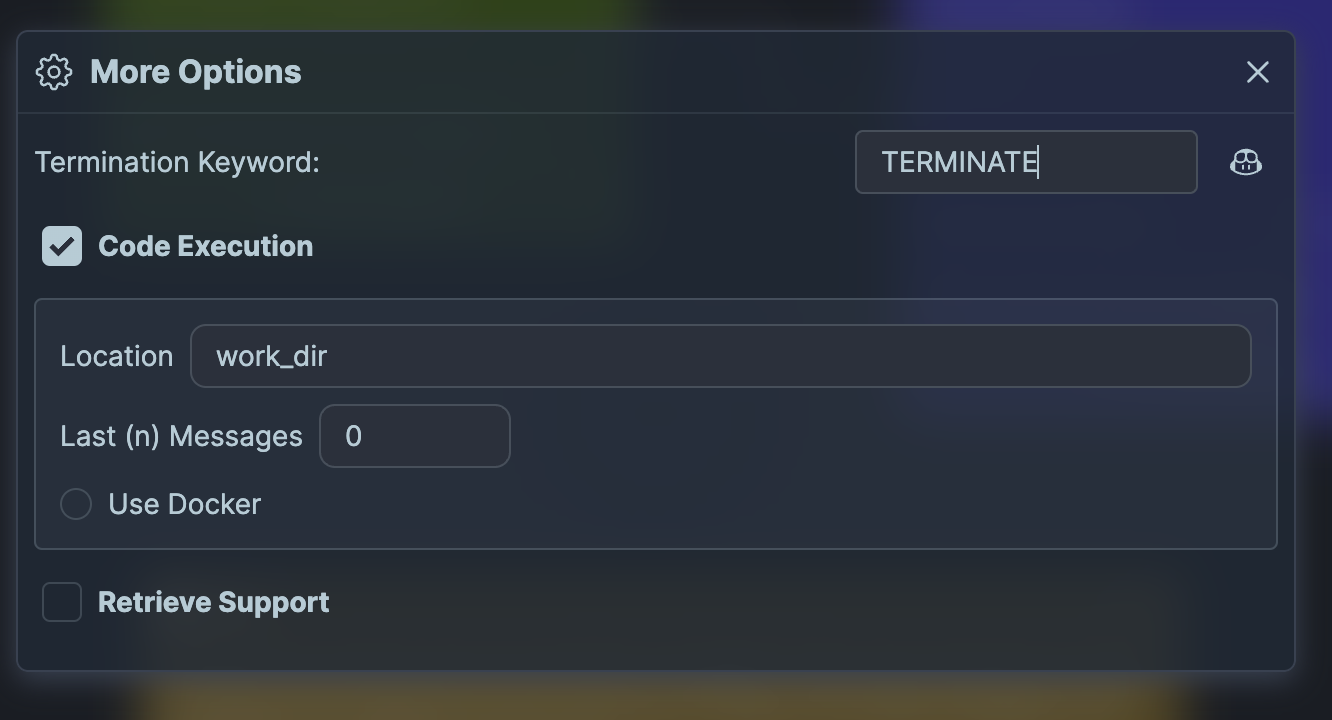
Click the More Options button on the UserProxy Agent. In the revealed dialog, activate
Code Execution Configby marking the corresponding checkbox. -
Still within the dialog, define the termination message command as
TERMINATEby clicking the robot icon adjacent to the input field.
With these configurations, your UserProxy Agent should look like this:
The More Options dialog should appear as follows:
Initiating the Workflow
Launch the workflow by clicking the Start Chat button, located in the top right corner. Input the message What day is it today? within the chat interface to witness the workflow’s response:
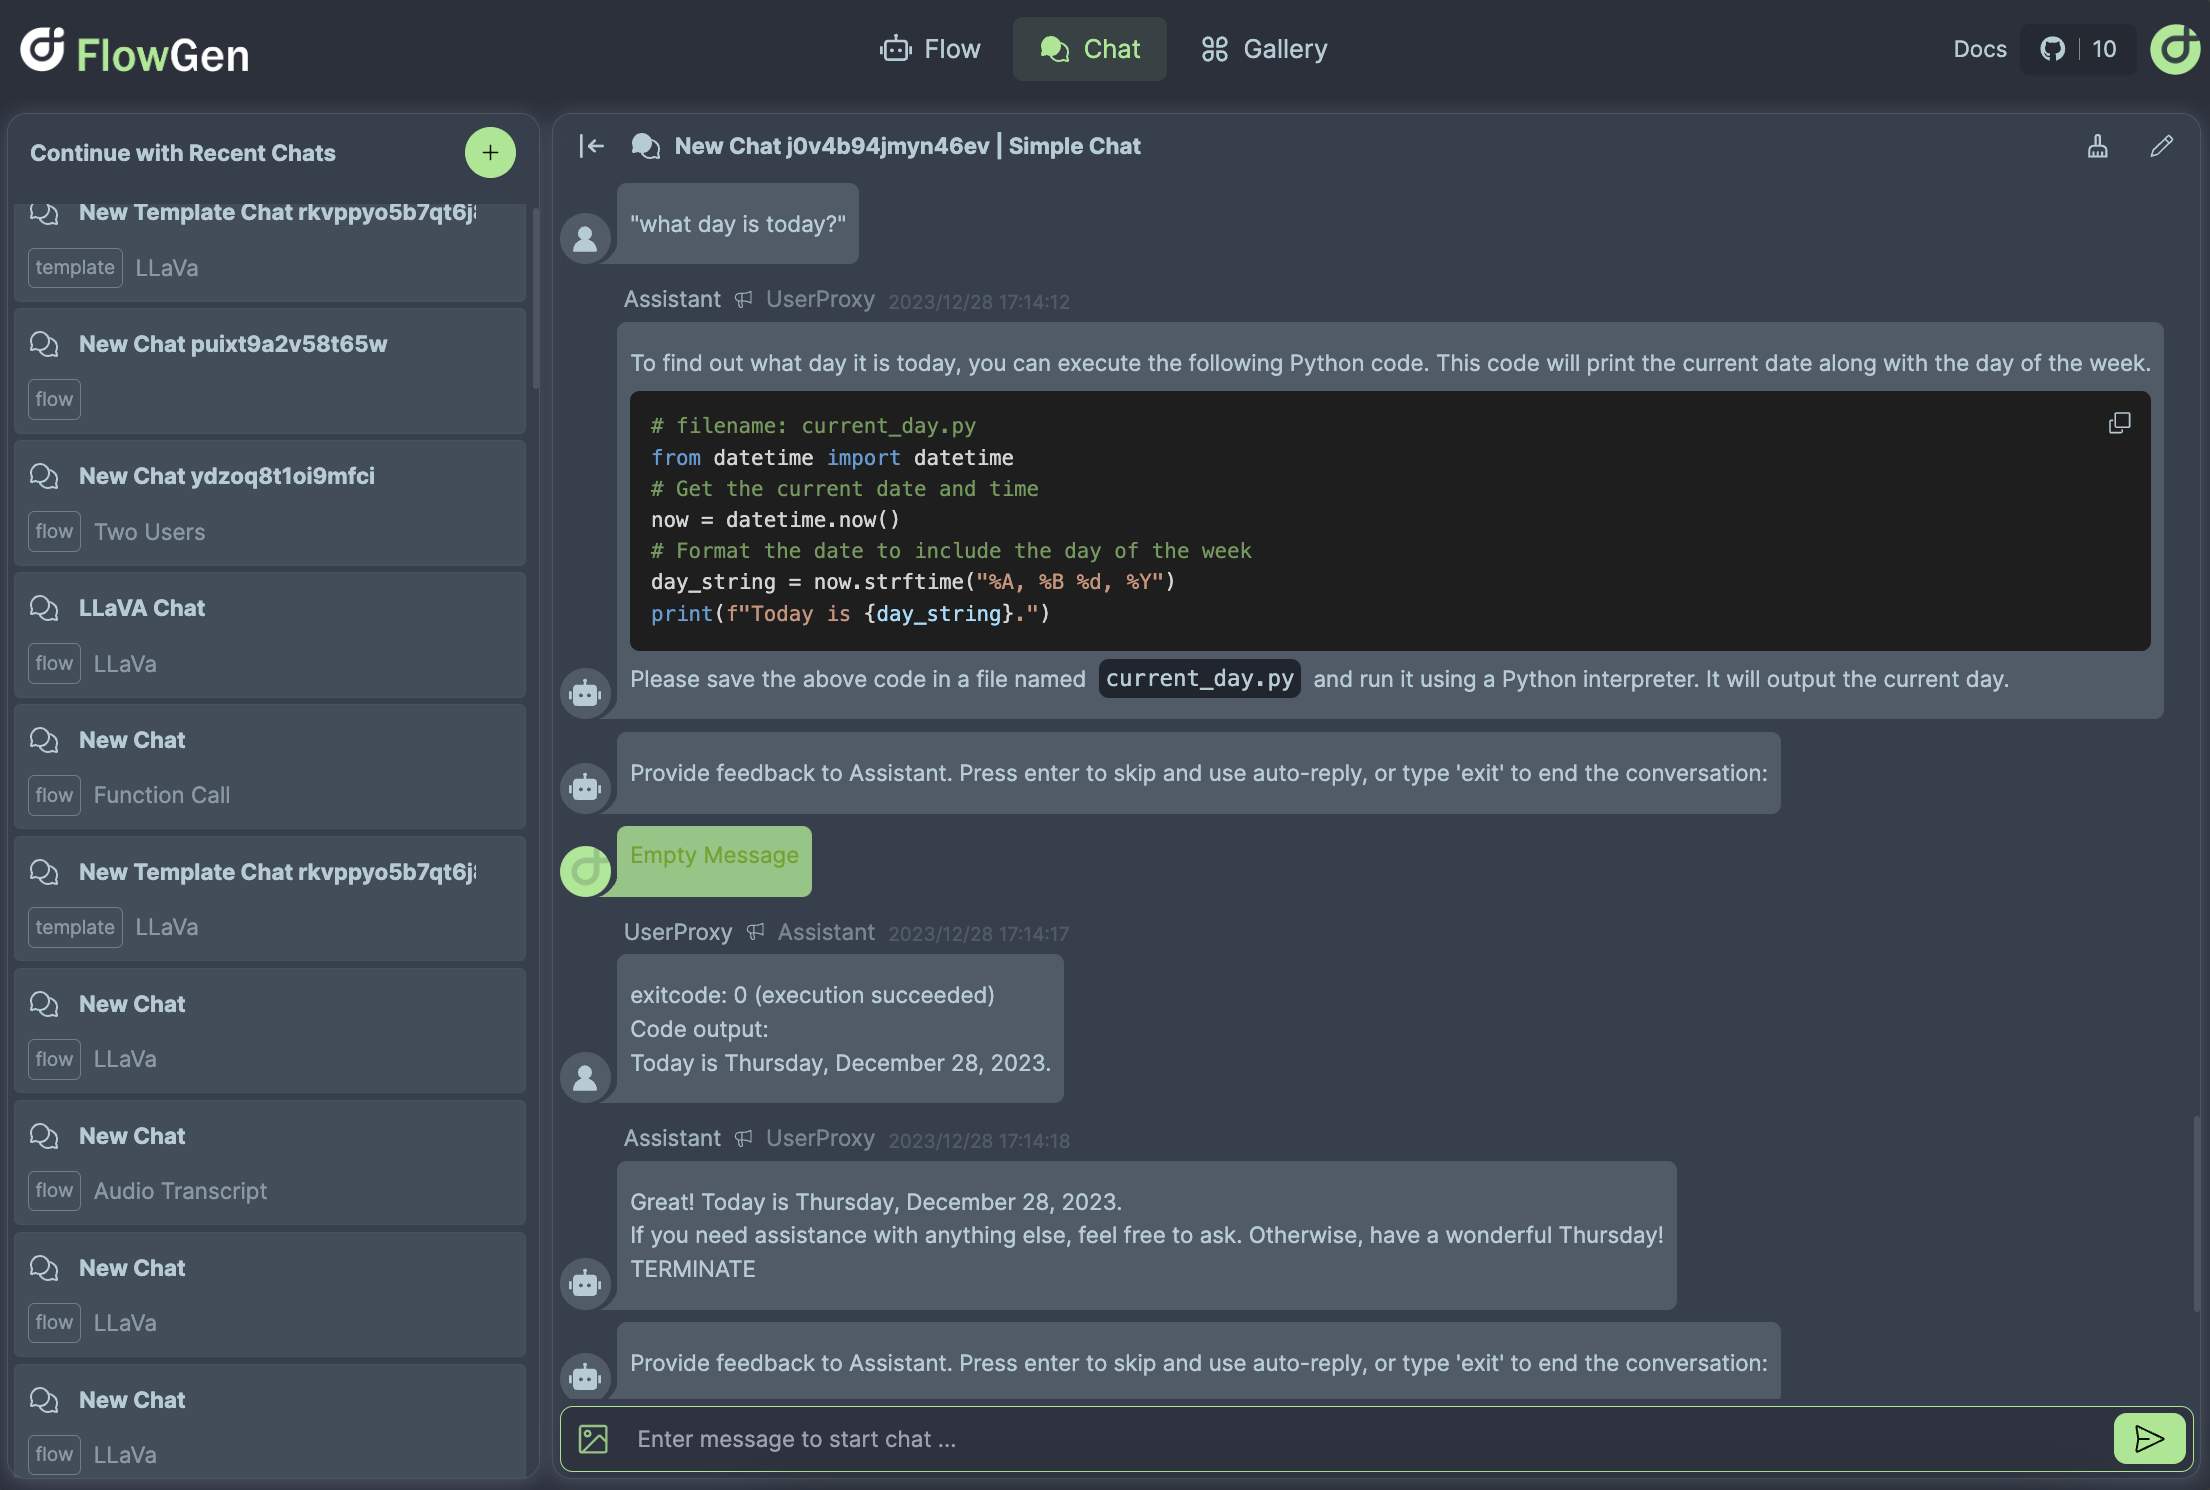
The Assistant Agent, lacking the current date data, will generate a pertinent code snippet and forward it to the UserProxy Agent. In turn, the UserProxy Agent runs the code and relays the output back to the Assistant Agent. The Assistant Agent deciphers this result and communicates the response back to the UserProxy Agent, which then delivers the final answer to the user.
Upon receiving a message, the UserProxy will cue for human participation. A prompt will be displayed in the chat, and the input field will be accentuated:
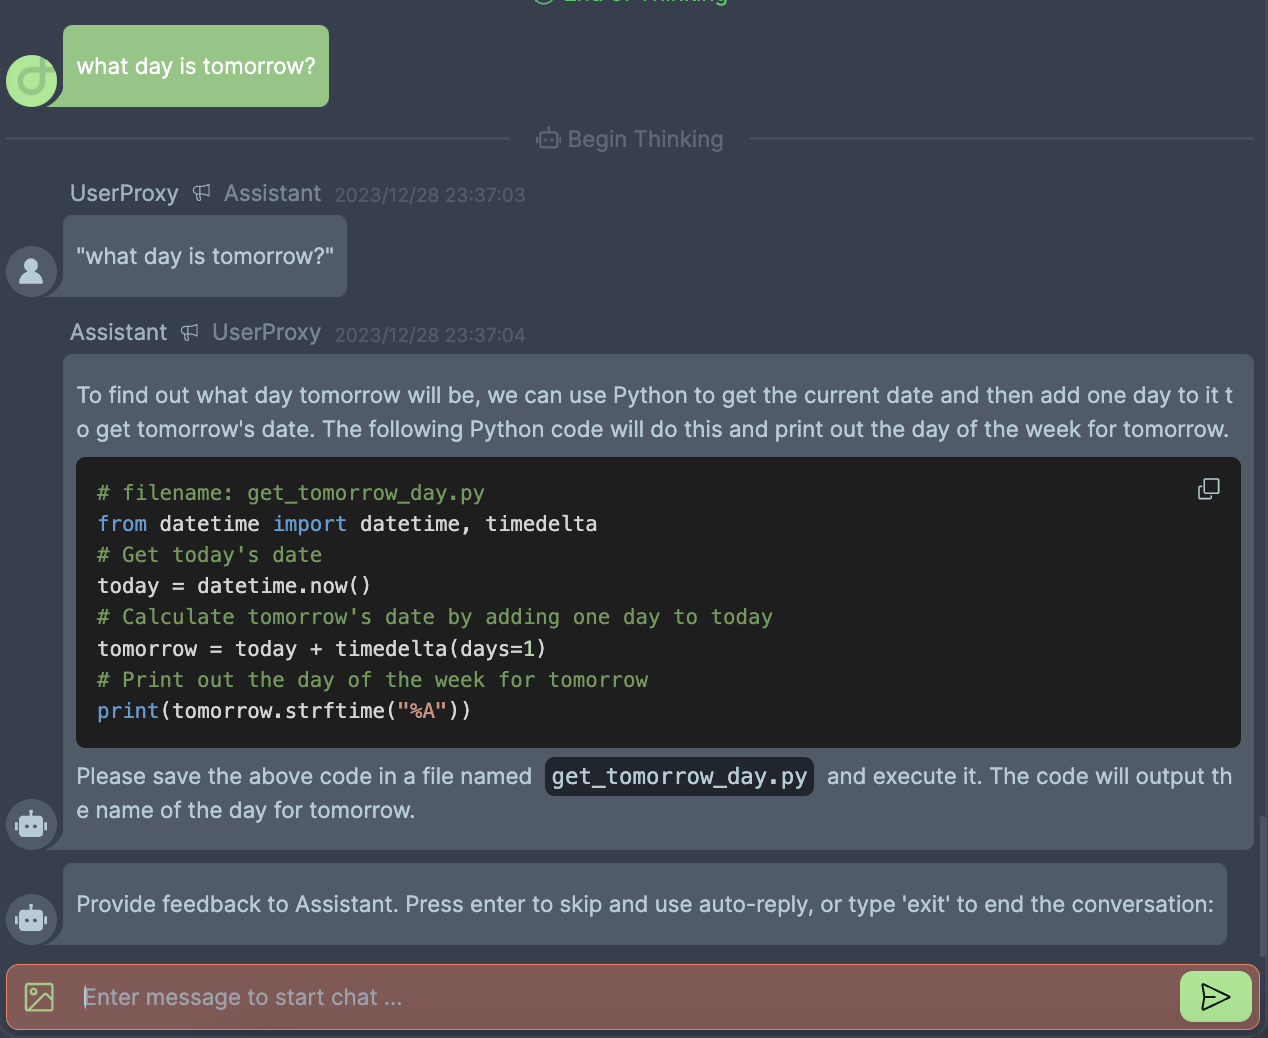
If you wish to execute the code snippet from the Assistant Agent, simply press ‘Enter.’ The system will proceed to execute the code and funnel the results back to the Assistant Agent.
User can submit follow-up inquiries like What day is tomorrow?, and the workflow will respond accordingly.
To terminate the workflow, user can input the term exit, prompting the system to cease operations.
Conclusion
Through this tutorial, you’ve learned to create a human-in-the-loop chatbot capable of answering queries and executing code snippets autonomously. This system replicates the functionality akin to ChatGPT, complete with plugin support.
Human intervention plays a crucial role in various scenarios, and this guide has illustrated how to seamlessly integrate this element into your workflows. By beginning with the provided sample, you are now equipped to craft and customize your very own human-in-the-loop systems, tailoring them to meet specific needs and requirements.